Hand-rolled Beeswax Candles

I love crafting with children, but with the unending responsibilities of motherhood, I usually only have the bandwidth for simple projects. Most welcome are activities that engage our attention but demand little in the way of preparation, supervision, and clean-up. In all of these ways, rolled beeswax candles fit the bill!
I taught my children to roll these candles when they were just 4 years old, and I think they’ve made them every year since. What started as a fun craft, soon gave way to a very practical skill. These days, it’s not uncommon for me to ask a child to roll a candle for dinner, birthdays, or other special occasions.
Now that my children are 9 and 13, I don’t have to help them at all, but early on - I’d say before the age of 9 - I usually needed to help them get started by putting the wick in place and rolling the first roll. After that, they were able to take over and finish their candles independently. If you want to take these candles a step further, you can buy beeswax in an assortment of different colors and let your children cut out tiny shapes using miniature cookie cutters. Then they can stick the shapes to the candle, burnishing them in place with the warmth of their hands!
Beeswax candles can be rolled a lot of different ways, the most popular being straight taper candles that use an entire 8” x 8” sheet of beeswax. Otherwise you can cut the sheets in half to make shorter or skinnier candles. You can also cut the sheets into tiny pieces to make make votives, advent, Hanukkah, or birthday candles like these.
Aside from having a warm and inviting aroma, we use beeswax candles for environmental reasons. Unlike many commercial candles, they won’t sully the air quality in your home with toxic chemicals; they’re also biodegradable and can be tossed into the compost bin when they’ve burned down to stubs, beyond reasonable use. This tutorial makes 2, 8” long taper candles.
Materials
8”x 8” beeswax sheet (in any color)
ruler
scissors or cutter
cutting mat (optional)
4 cotton wick (at least 9 inches long)
Directions
1. If your sheets are full size (16” x 16” sheets), cut them in half to create two, 8” x 8” sheets.
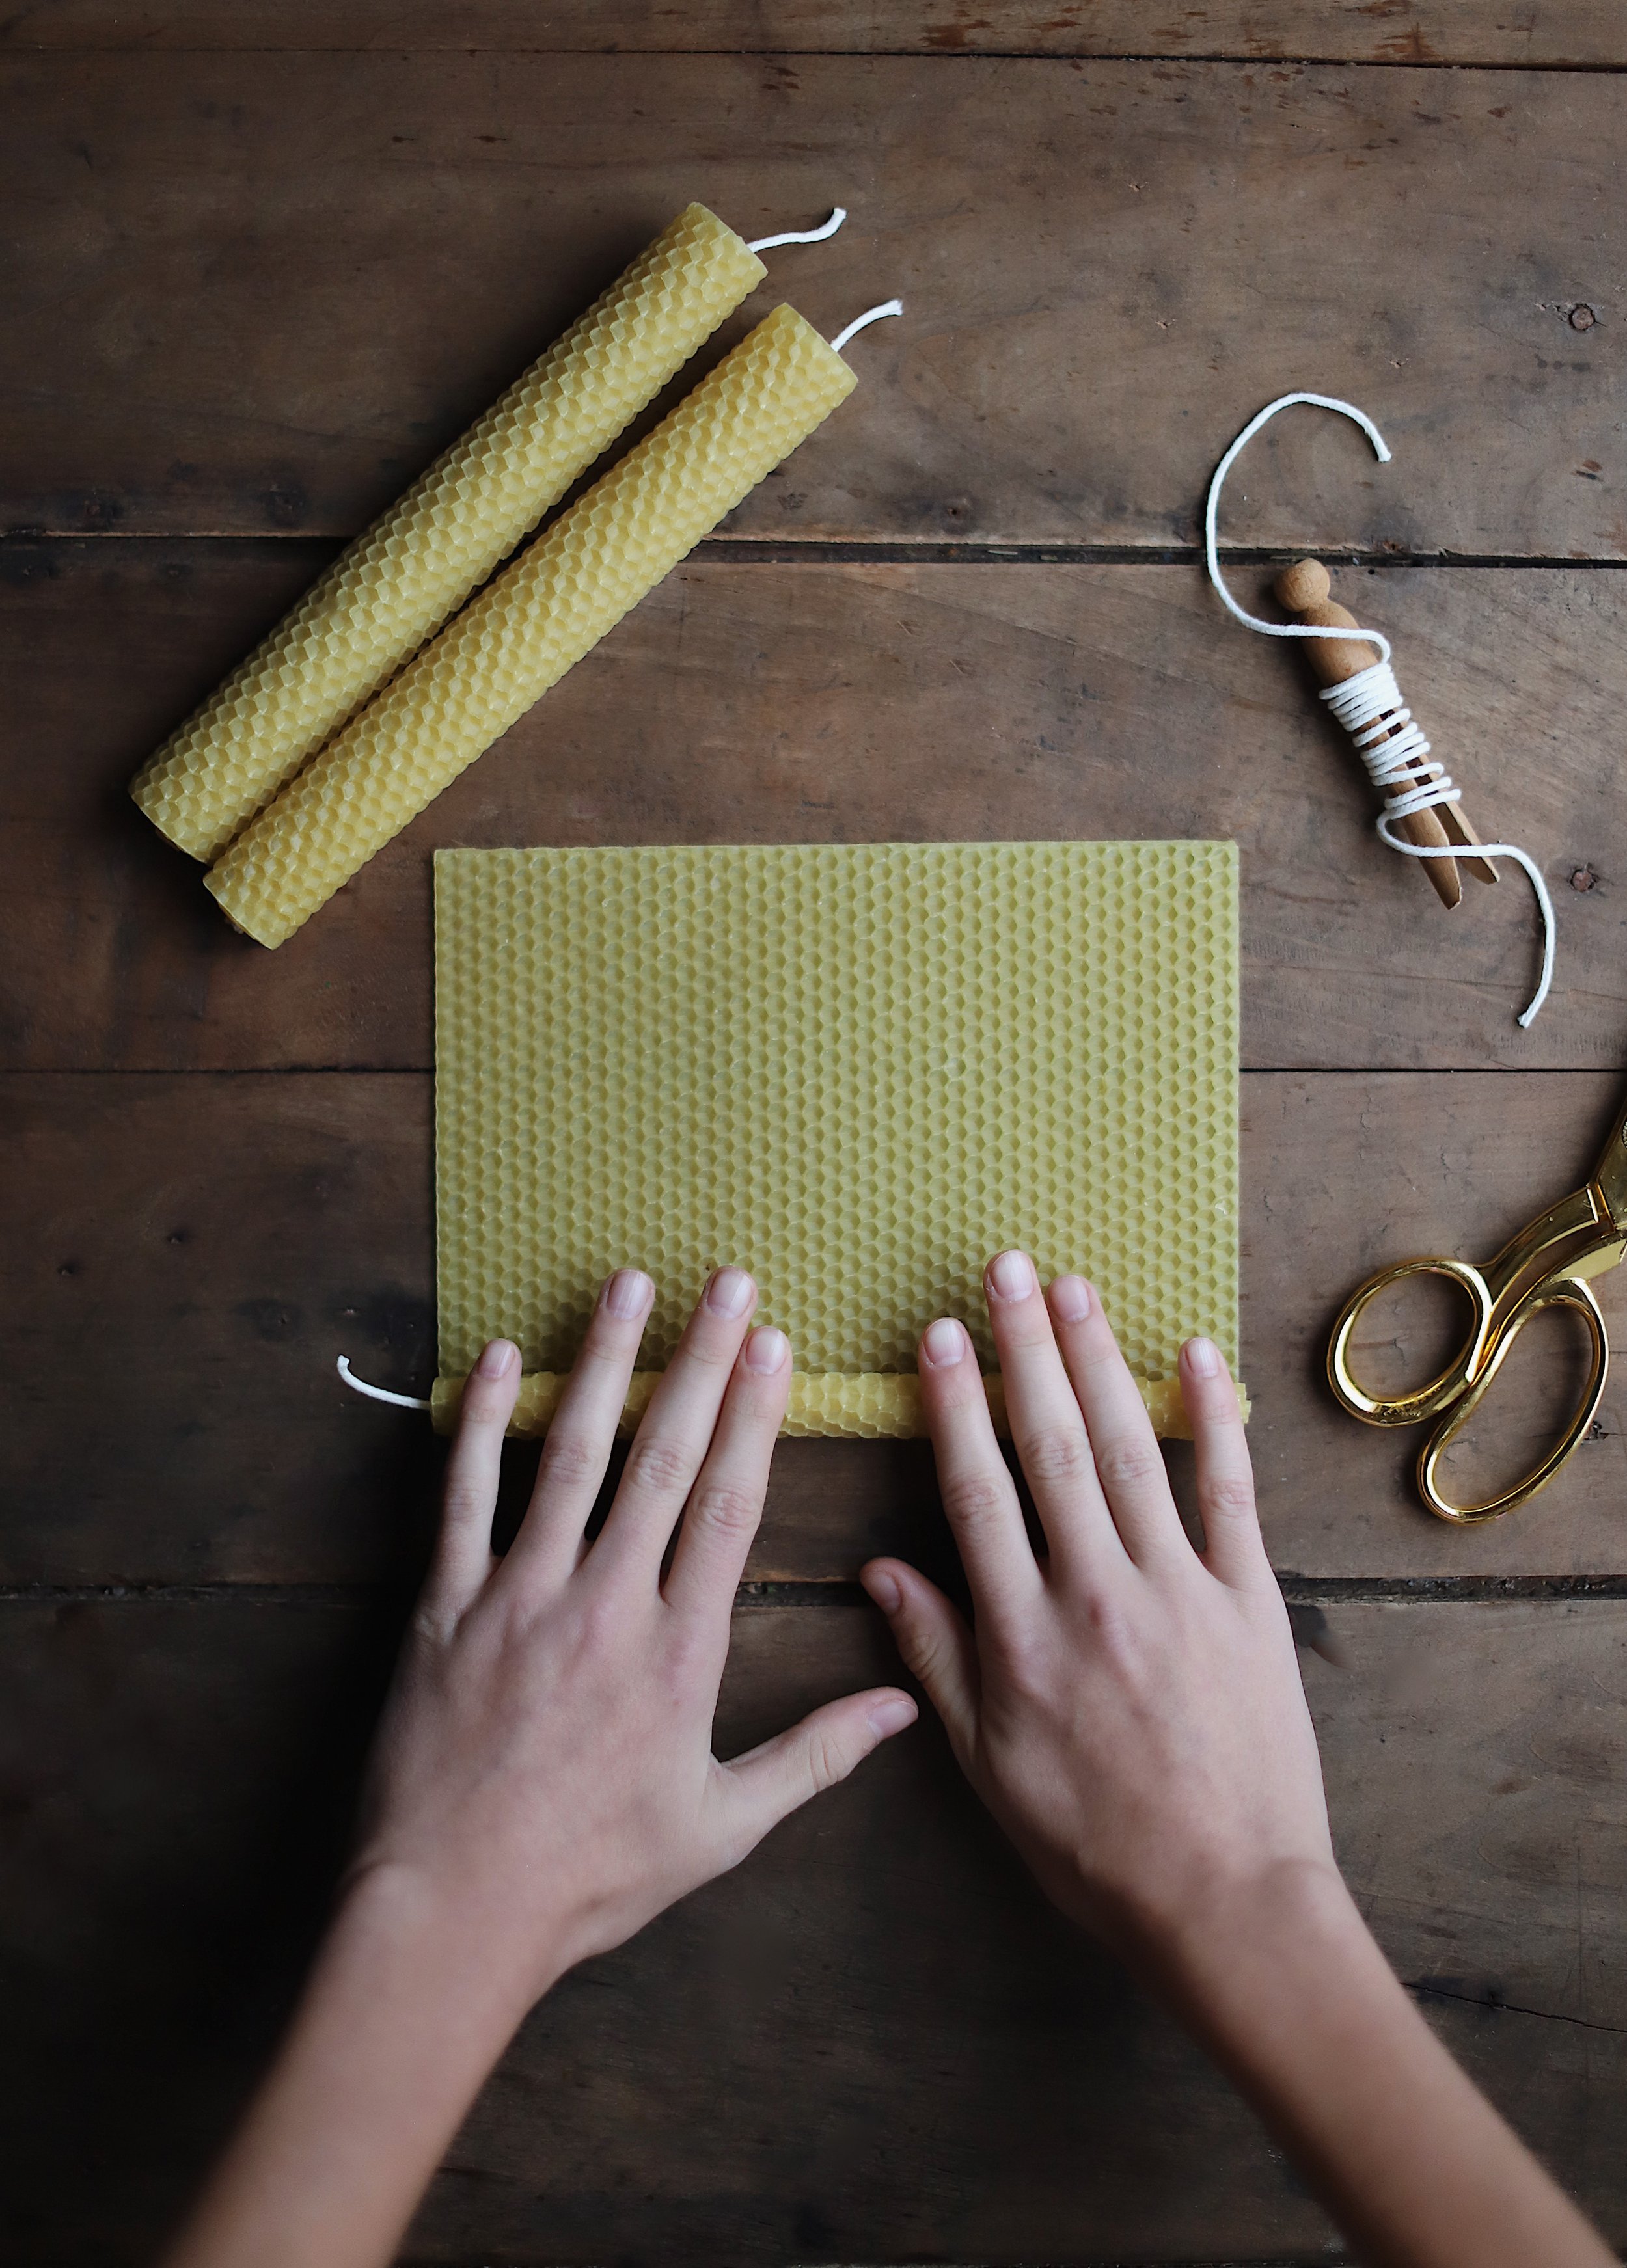
2. Lay the first beeswax sheet flat on a table in front of you.
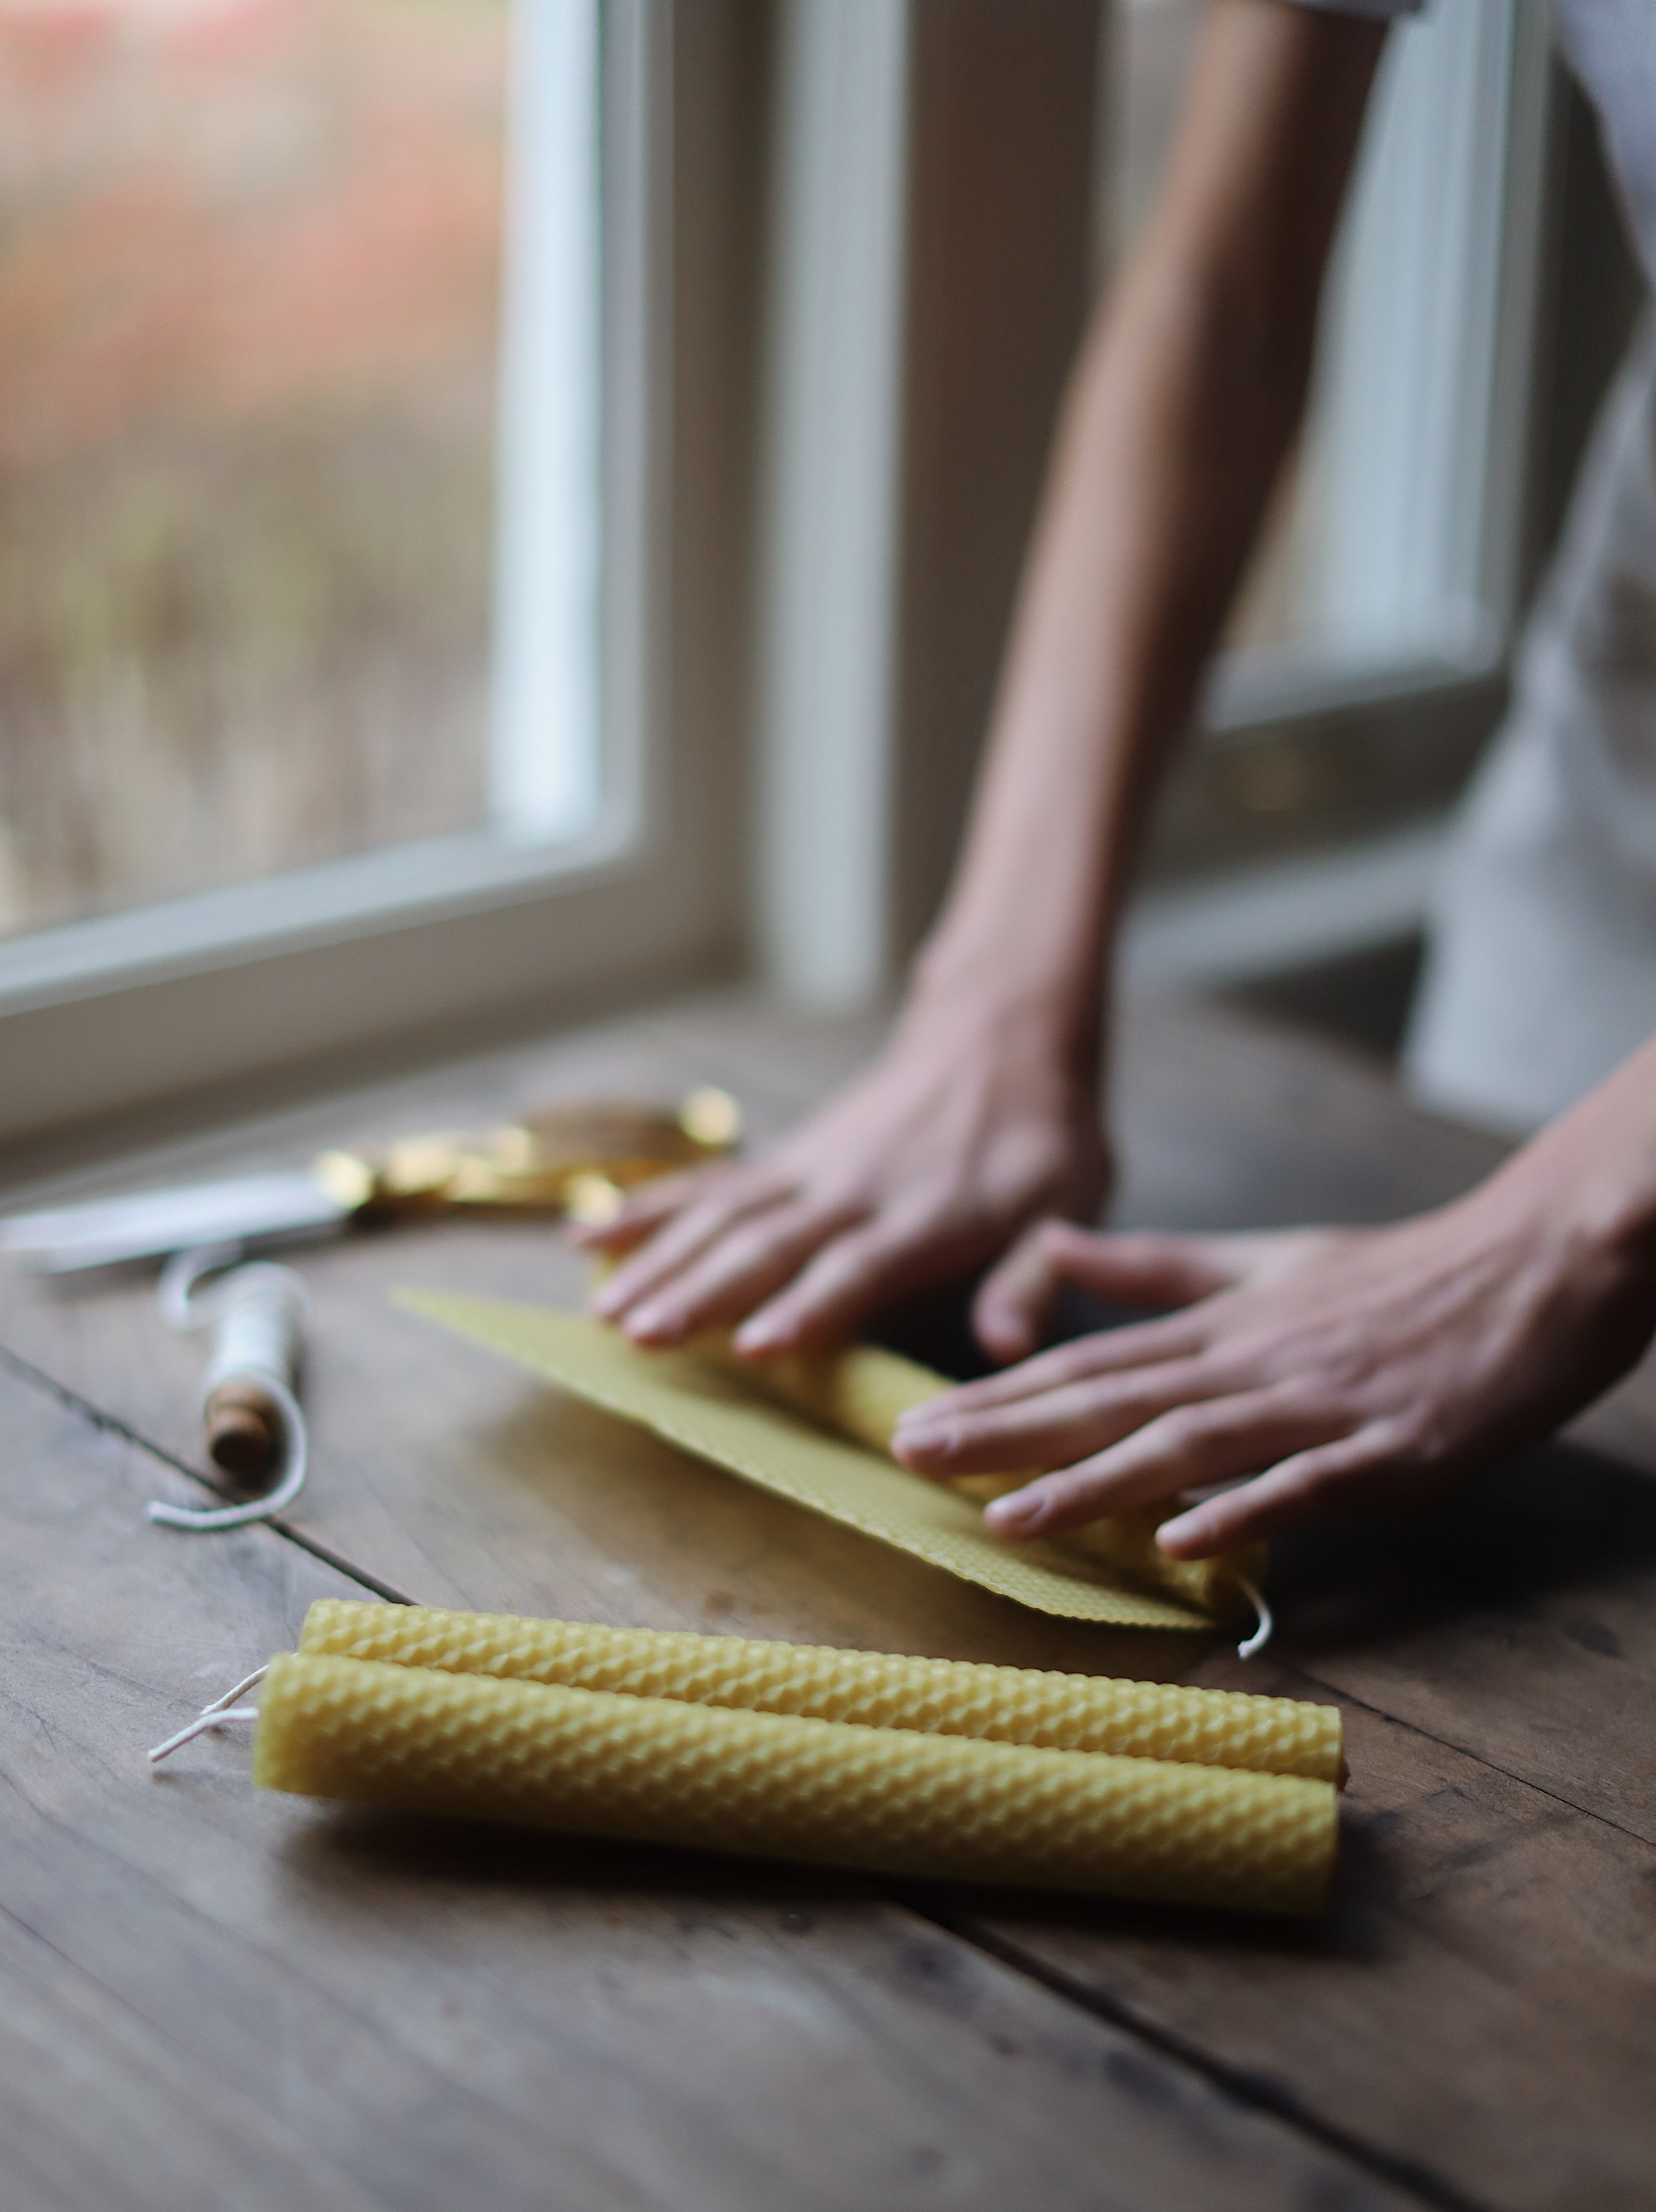
3. Place the wick along the edge of beeswax closest to you. Fold the wax over the wick and start rolling it away from you.
4. Continue to roll the beeswax firmly and evenly until you reach the other edge.
5. When you get to the other edge, gently burnish the wax by pressing it into the side of the candle.
5. Trim the wick on both sides of the candle, leaving 1/4 “ excess on top. Press the bottom wick into the base of the candle.
6. Repeat the process for the other beeswax sheet.
7. Place in a candle holder, have an adult light the candle, and set it in a safe spot for all to enjoy.
* If you’d prefer to buy a rolled beeswax candle kit, you can find them at Woodlark here.