Upcycled Paper Angel Ornaments


Every night after dinner, Benjamin works on homework while Eloise and I play board games or make things at the art table. Lately we’ve been consumed with Scrabble, but last night we rummaged through the art cabinet, pulled out some old wrapping paper, and whipped up these classic Christmas ornaments. They were so fun to fold, and I loved that I could show Eloise how to make them once and count on her to work independently afterwards. If you’ve ever folded accordion paper fans, you’ll know exactly what to do. If not, the instructions and photos in this tutorial will hopefully show you how! The most time-intensive step for us was cutting our paper into perfect little squares. Luckily, Eloise was laser-focused on this step, if only because she got to use a rotary cutter for the first time in her life!
A few notes about these ornaments: I’m sharing them primarily as an example of an environmentally-friendly Christmas activity. With advent starting next week, I know some parents are scrambling to think of 25 prompts for the holidays. And although a crafting project tends to require more bandwidth than, say, singing a carol or watching a movie, this activity is simple and won’t require running out to buy a craft kit or shopping online for art supplies. If you don’t have used wrapping paper lying around, you can upcycle printer paper, paper bags, newspaper, pages from a tattered book, old cards, expired calendar pages, magazine covers, etc., And although the directions call for twine to tie up the ornaments, yarn, embroidery thread, or old pipe cleaners would work fine too!
You can also improvise by making large or small sized angels. We made small ornaments and eventually tied them on twine to make a bunting for our fireplace mantle, but in year’s past, we’ve made larger ones to hang on the Christmas tree and to decorate gift boxes. Next week, we’re planning to make these gorgeous paper wheels. I just have to figure out how to do it first, which might take me a minute since the directions online are always in Swedish or Dutch! Until then….Merry Christmas!
Materials
paper (in two sizes, 12”x 12” and 6”x 6” squares for large ornaments and 6” x 6” and 3” x 3” for small ornaments)
two pieces of twine, approximately 12” long for large ornaments and 6” long for small ones
glue
Directions
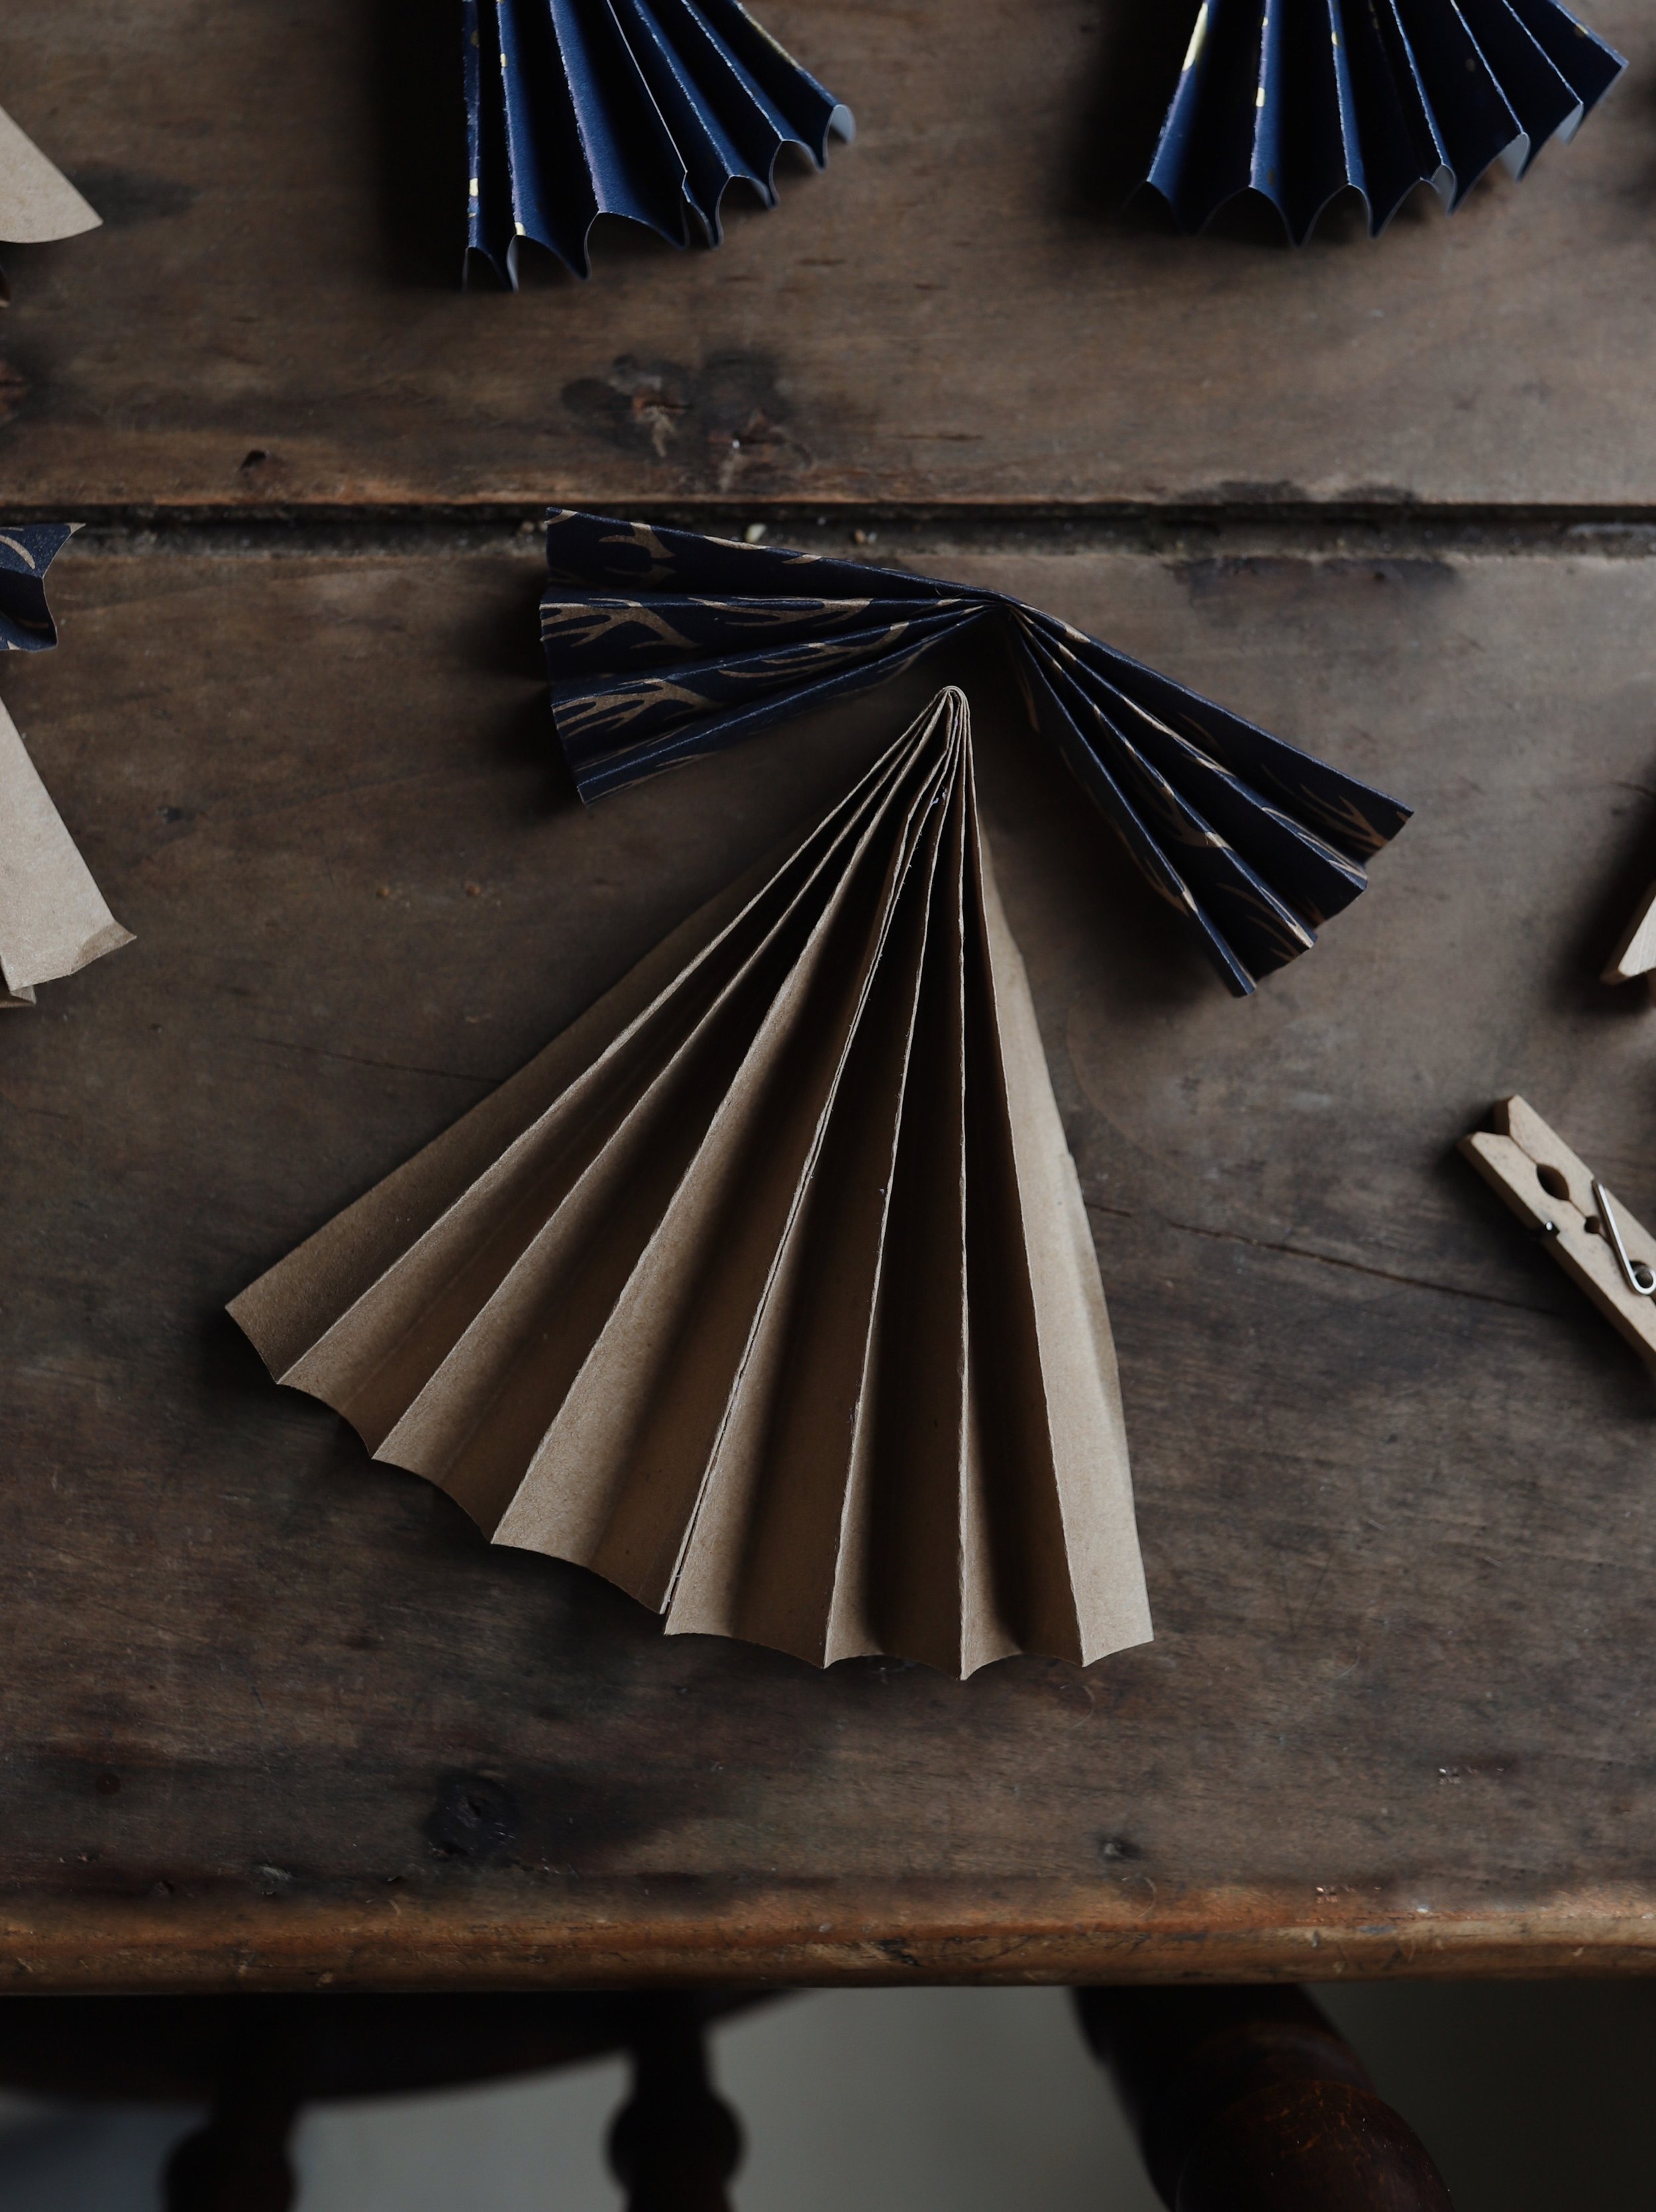
1. Accordion fold the larger square, then accordion fold the shorter square. The larger square will be the angel’s body; the smaller square will be her wings.
2. Fold both squares in half, making sure the edges are even. If they’re not quite even, simply snip the ends so they line up perfectly.
3. Place the center fold of the smaller fan on top of the center fold of the larger fan (see second photo) so that the print sides of the fans are both facing up (unless you want to mismatch them). .
4. Attach the two fans together by wrapping one piece of twine around them one inch from the top of the angel’s head. Double knot the twine on the backside of the angel’s body.. Cut the ends of the twine.
5. Loop the other piece of twine through the underside of the two folds (through the angel’s head) to create a loop for hanging the ornament. Double knot it, snip the ends, and hide the knot on the backside or inside the angel’s head.
6. Glue the inside of the side pieces of the larger fan together to adjoin the inside of the angel’s dress.
7. Spread out the accordion folds as needed to shape the angels wings and dress.
8. Hang from the Christmas tree or make several to create an angel bunting.