Solstice lanterns
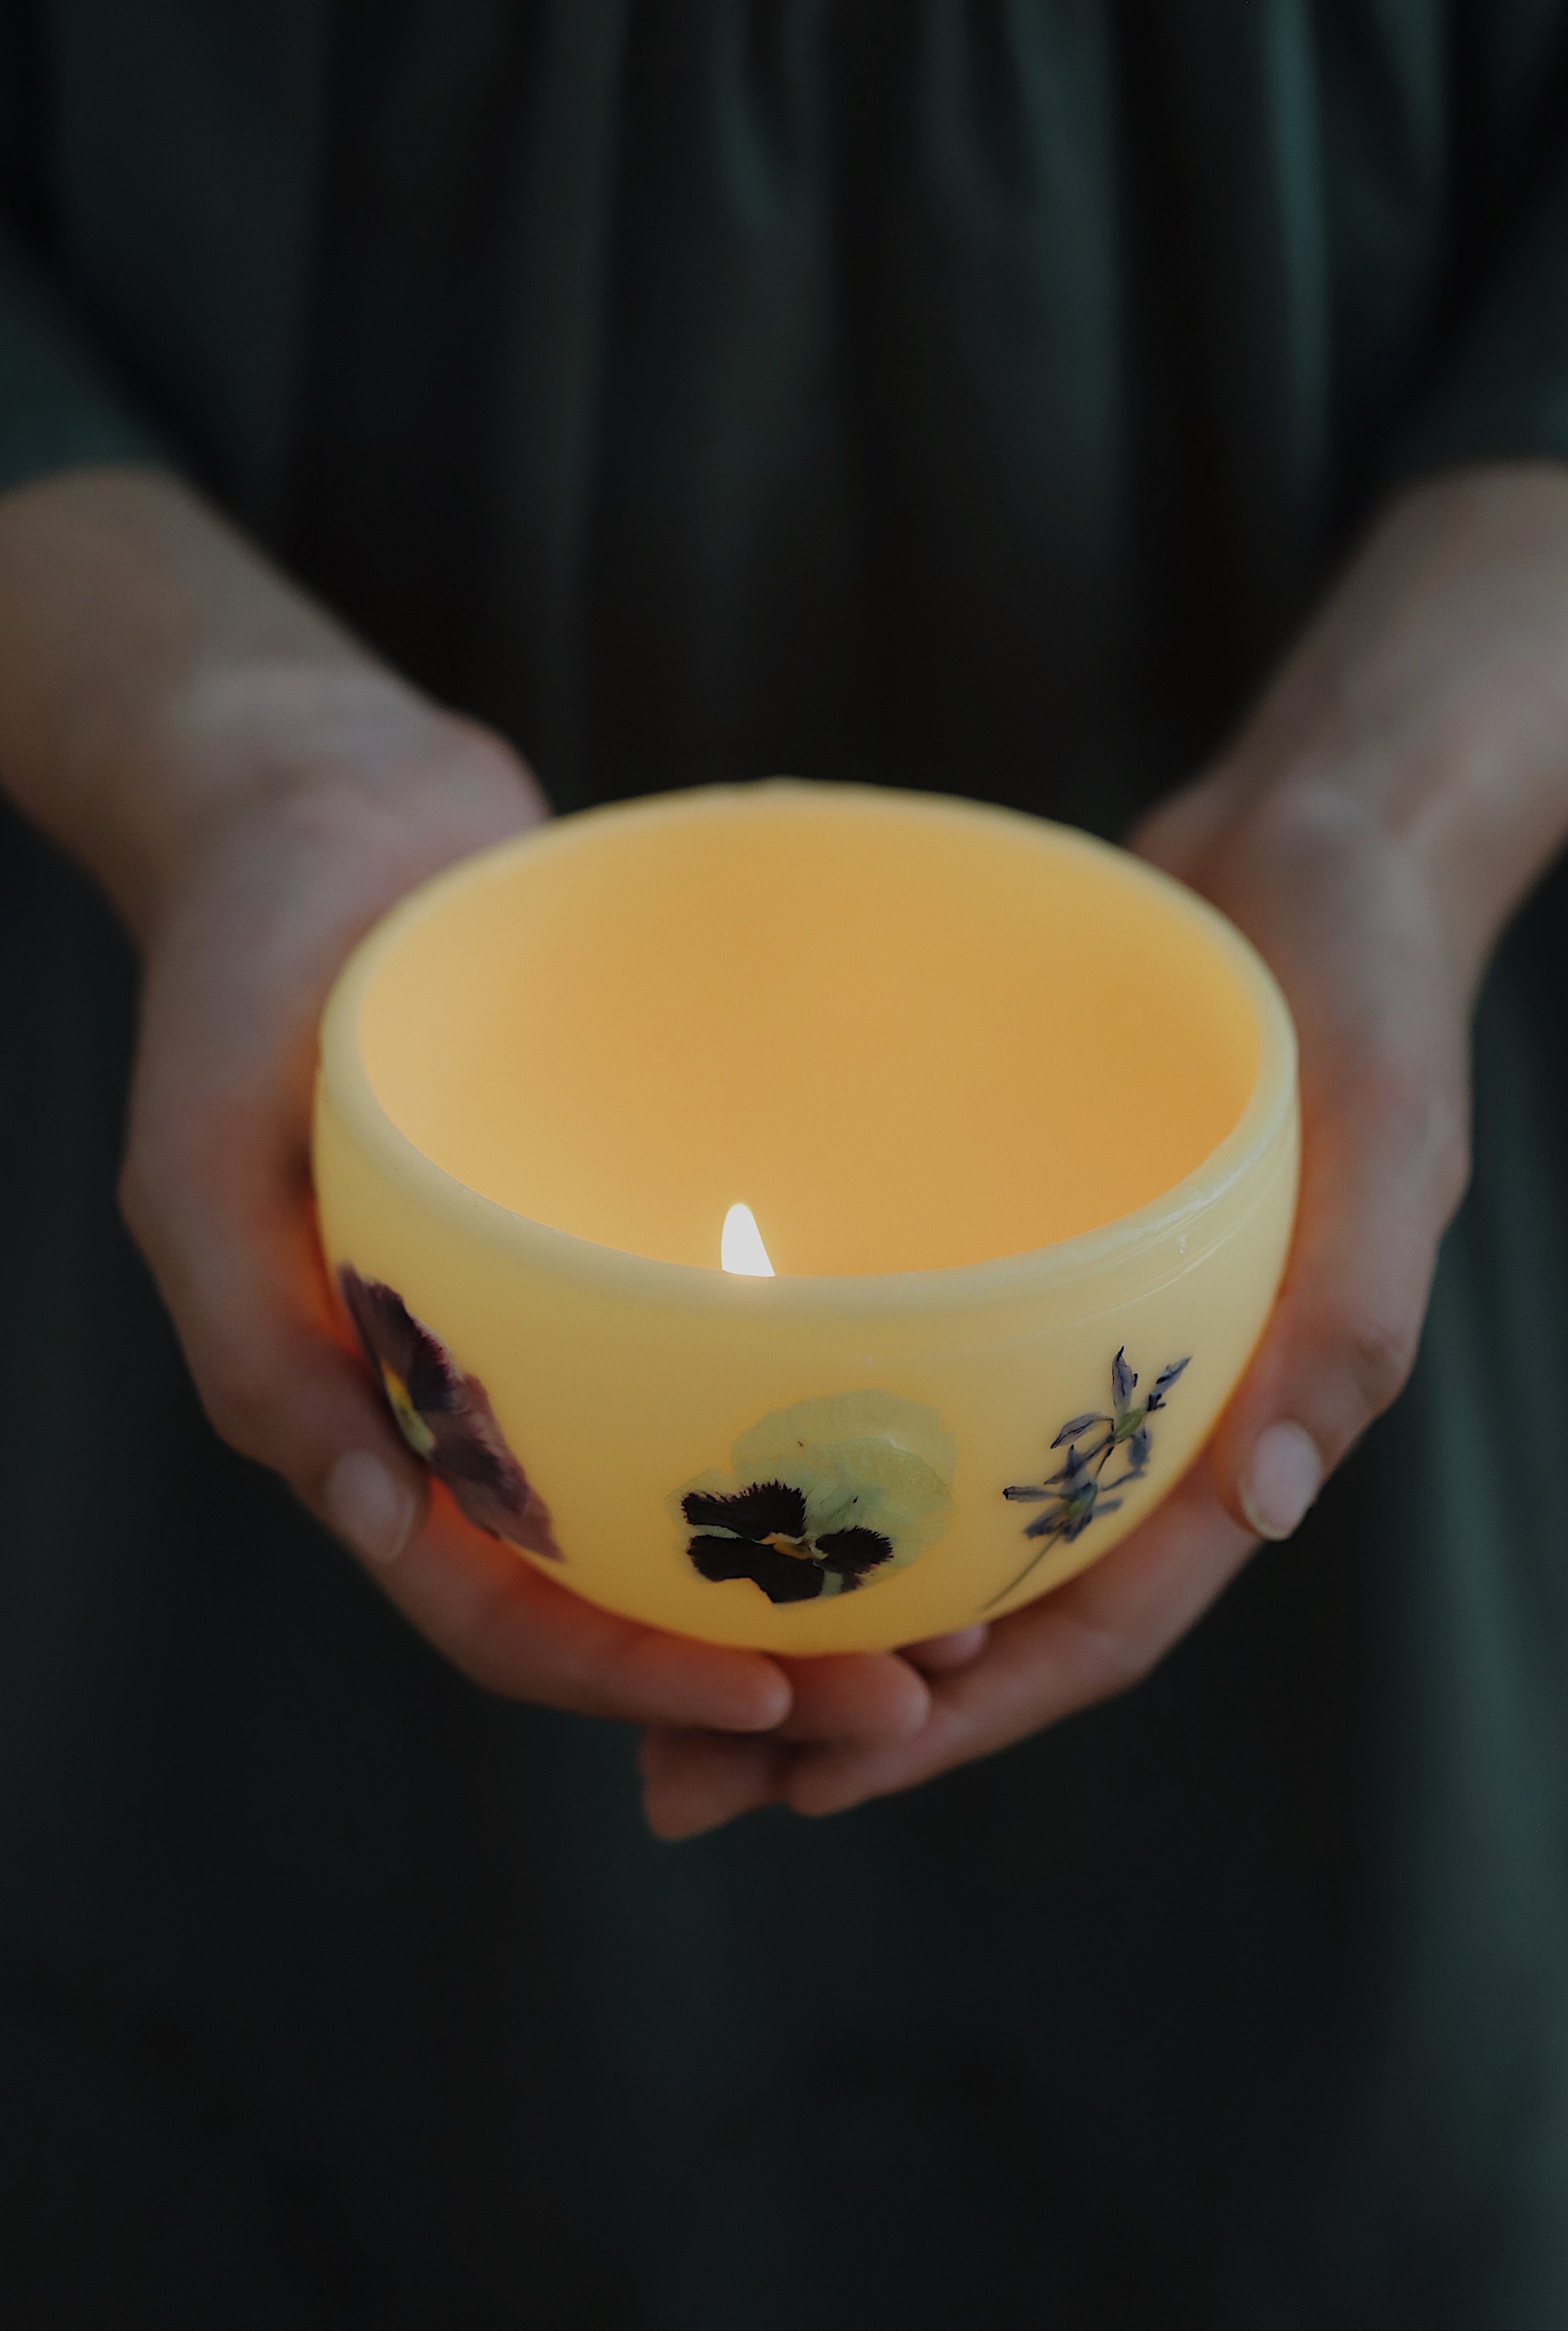
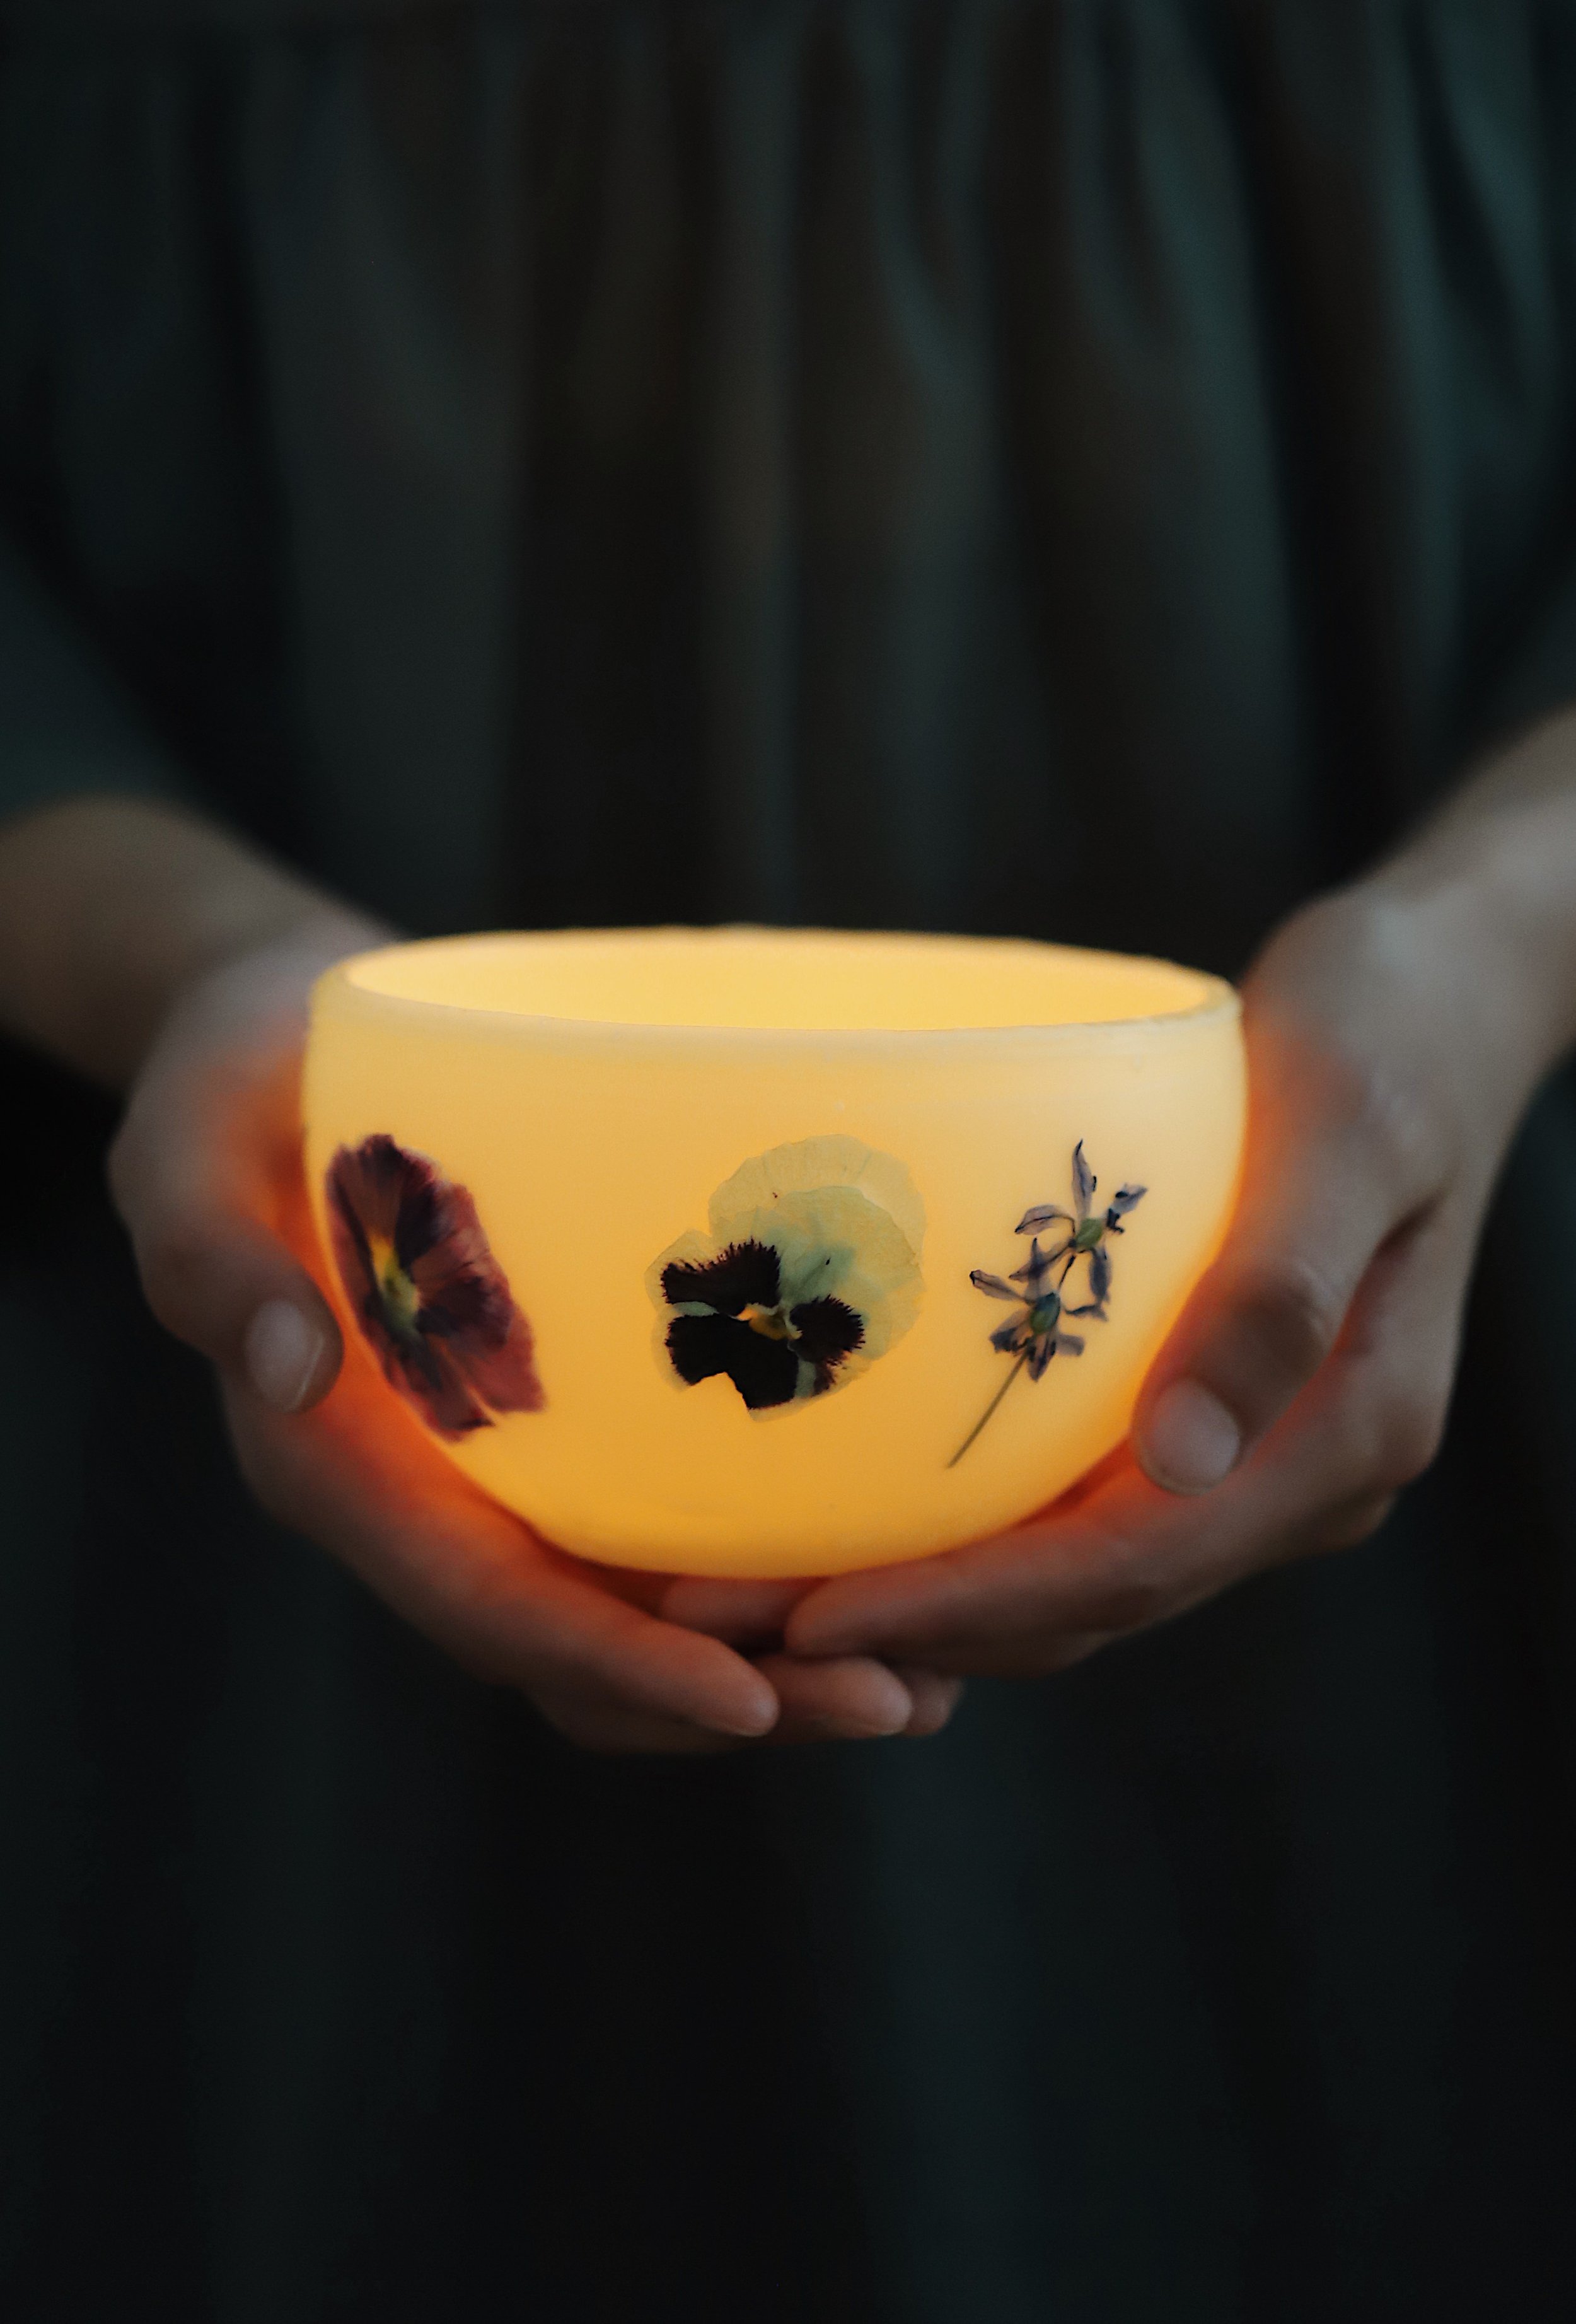
When Eloise and Benjamin were younger, making lanterns was a yearly affair. Usually, we’d make something simple by decorating glass jars with colorful tissue paper, but occasionally we’d veer from tradition and make something a bit more involved and festive. Of all the luminaries we’ve created, these pure beeswax lanterns are my favorite. Lit up, they look like warm golden globes and smell of honey.
To make them, we dip the bottom half of an inflated balloon in melted beeswax 15-20 times. Then, once the wax dries (and the shell is nice and sturdy), we pop the balloon, peel it away from the beeswax, and place a tea light inside the lantern.
Although they’re not particularly hard to make, they do involve some preparation (and some bandwidth too!), so I’d recommend making them on a weekend or a day when you’re not pressed for time or feeling averse to making a mess. I’d also recommend working closely with young children or better yet, finding ways to engage them and keep them safe. When my children were really little, I let them pour the beeswax into the double boiler, then I’d let them pick out dried flowers while I boiled down the wax. Now that they’re older (10 and 13), they’re able to do the dipping safely, although I still boil and handle the hot wax.
If you’re looking for fun holiday activities, these luminaries would be perfect for advent or solstice. The pressed flowers are optional. We had some drying in our flower press from last summer - if you don’t have any on hand, the luminaries are just as pretty kept plain.
Materials
kraft paper or newspaper
balloon
double boiler (one small pot + one large saucepan; a crock pot will work too!)
1-2 pounds of pure beeswax (blocks or pellets), depending on size of your balloon
1, 9” balloon
popsicle stick
bowl of ice cold water
pressed leaves or flowers (optional)
flat pan
parchment paper
Directions
1. Cover your work surface with kraft paper or newspapers - dripping beeswax is messy!
2. Fill up your balloon with water and secure it with a knot. The size of your balloon will determine the size of your lantern (and also how much beeswax is needed).
2. Create a double boiler: fill a large saucepan with 2 inches of water and bring it to a simmer. Place the small pot in the center of the saucepan. You’ll want a pot with a small diameter so that a 1-2 pounds of beeswax will create enough depth in the pot to submerge the balloon. At the same time though, the pot needs to be wide enough to dip your balloon into it. (An old crock pot would work too if you have one you don’t mind dedicating to beeswax projects).
3. Place the beeswax inside the small pot and stir it occasionally with the popsicle stick to help it melt faster and evenly.
4. When the wax has melted completely, turn off the stove and transfer your pot to your work space.
5. Holding the balloon by the knot, carefully dip it to its midpoint in the melted wax, being careful not to go above the waterline (otherwise the balloon might pop!). Remove it from the wax, and let it dry for about 20 seconds while continuing to hold it from the knot. To speed up the drying process, dip the balloon in a bowl of ice cold water.
6. Repeat the process of dipping the balloon in the hot wax and ice cold water 15-20 times, until the lantern is about 1/4 “ thick. (or a little less). If the wax in the pot starts to thicken or harden during this process, reheat it for a minute or longer to melt it back to liquid form.
7. To decorate the lantern, dip leaves and/or flowers once in the wax, allow them to dry, then gently press them into the sides of the lantern. Once they’re secure and to your liking, dip the lantern one more time to help hold the leaves and/or flowers in place.
8. Allow lantern to cool, then hold it upside down over the sink, snip the top of the balloon, empty the water, and gently remove the balloon.
9. If the lantern doesn’t sit flat, set a flat pan over a burner on the stove, heat if for a minute, then remove it from the heat. Cover it with parchment paper and set the lantern on the hot tray. Move the lantern in circles against the tray, until the bottom softens, molds to the tray, and rests flat. If the rim of your lantern is uneven, you can repeat this step to give it a smooth edge.
10. Place a tea light candle inside your luminary, light it, and enjoy!
Tip: To clean the beeswax from your pot, heat it in the oven or over the stove again, let the wax melt back to its liquid state, and carefully wipe it away with a paper towel. If you have a lot of wax remaining, you can save it by pouring it into silicone molds, allowing it to cool and harden, then storing it in an airtight container to use later.