Cardboard Loom Coasters


A couple summers ago, Eloise and I made mug rug coasters using nothing more than leftover pieces of yarn from old knitting projects and a loom we fabricated from a piece of recycled cardboard. Although originally intended to be coasters, Eloise used her rugs to create mats and blankets for the tiny stuffed animals living in her dollhouse. I was happy to see her find such a fun and playful purpose for them and, more importantly, they’re still in good use today!
This week, as we were looking for homemade holiday gifts to make, we dusted off our little makeshift looms and tried our hands at weaving again. I’d forgotten how much peace handwork brings me until I found myself sneaking off to the art table so I could squeeze in a few rows. Something I learned the last time we made these together is that it’s best to make two looms from the get-go - one for you and one for your child. There’s a good chance you’ll want to get in on the action and, in my experience, children enjoy doing handwork more when it’s done alongside a grown up. Plus, it’ll keep you from sweeping in, taking over, or hovering above your child’s work - all of which tend to shut my kids down!
Just a few notes before you get started: 1) Any type of yarn will do as long as it’s thin enough to fit into the notches of the loom. 2) Keep in mind though - the thicker the yarn, the faster the weaving will go. 3) Also, wool yarn will result in a fluffier, cozier style of coaster whereas cotton yarn will make for something tidy, trim, and neat, like the one in the photos to the left. 4) If you want to use more than one skein of yarn, not a problem. As you’ll see in the directions below, you can trim off the yarn once your row is the width you want, then - at the end of the project- you can to tuck the remaining tail of thread neatly through the weaving on the backside of the coaster. 5) As far as size goes, these coasters end up being about 3 1/4”w x 4 1/2”l, without fringe, but you can certainly make them larger (and even make a rug) by increasing the dimensions of your loom. 6) Finally, it’s very hard to muck up this project, but do be careful not to pull the yarn too right as you weave; otherwise the coaster will get narrower and narrower as you go. See photo 3 for what NOT to do! You want your coaster to be the same width from top to bottom, with the shape of a rectangle rather than an hourglass. Enjoy!
Materials
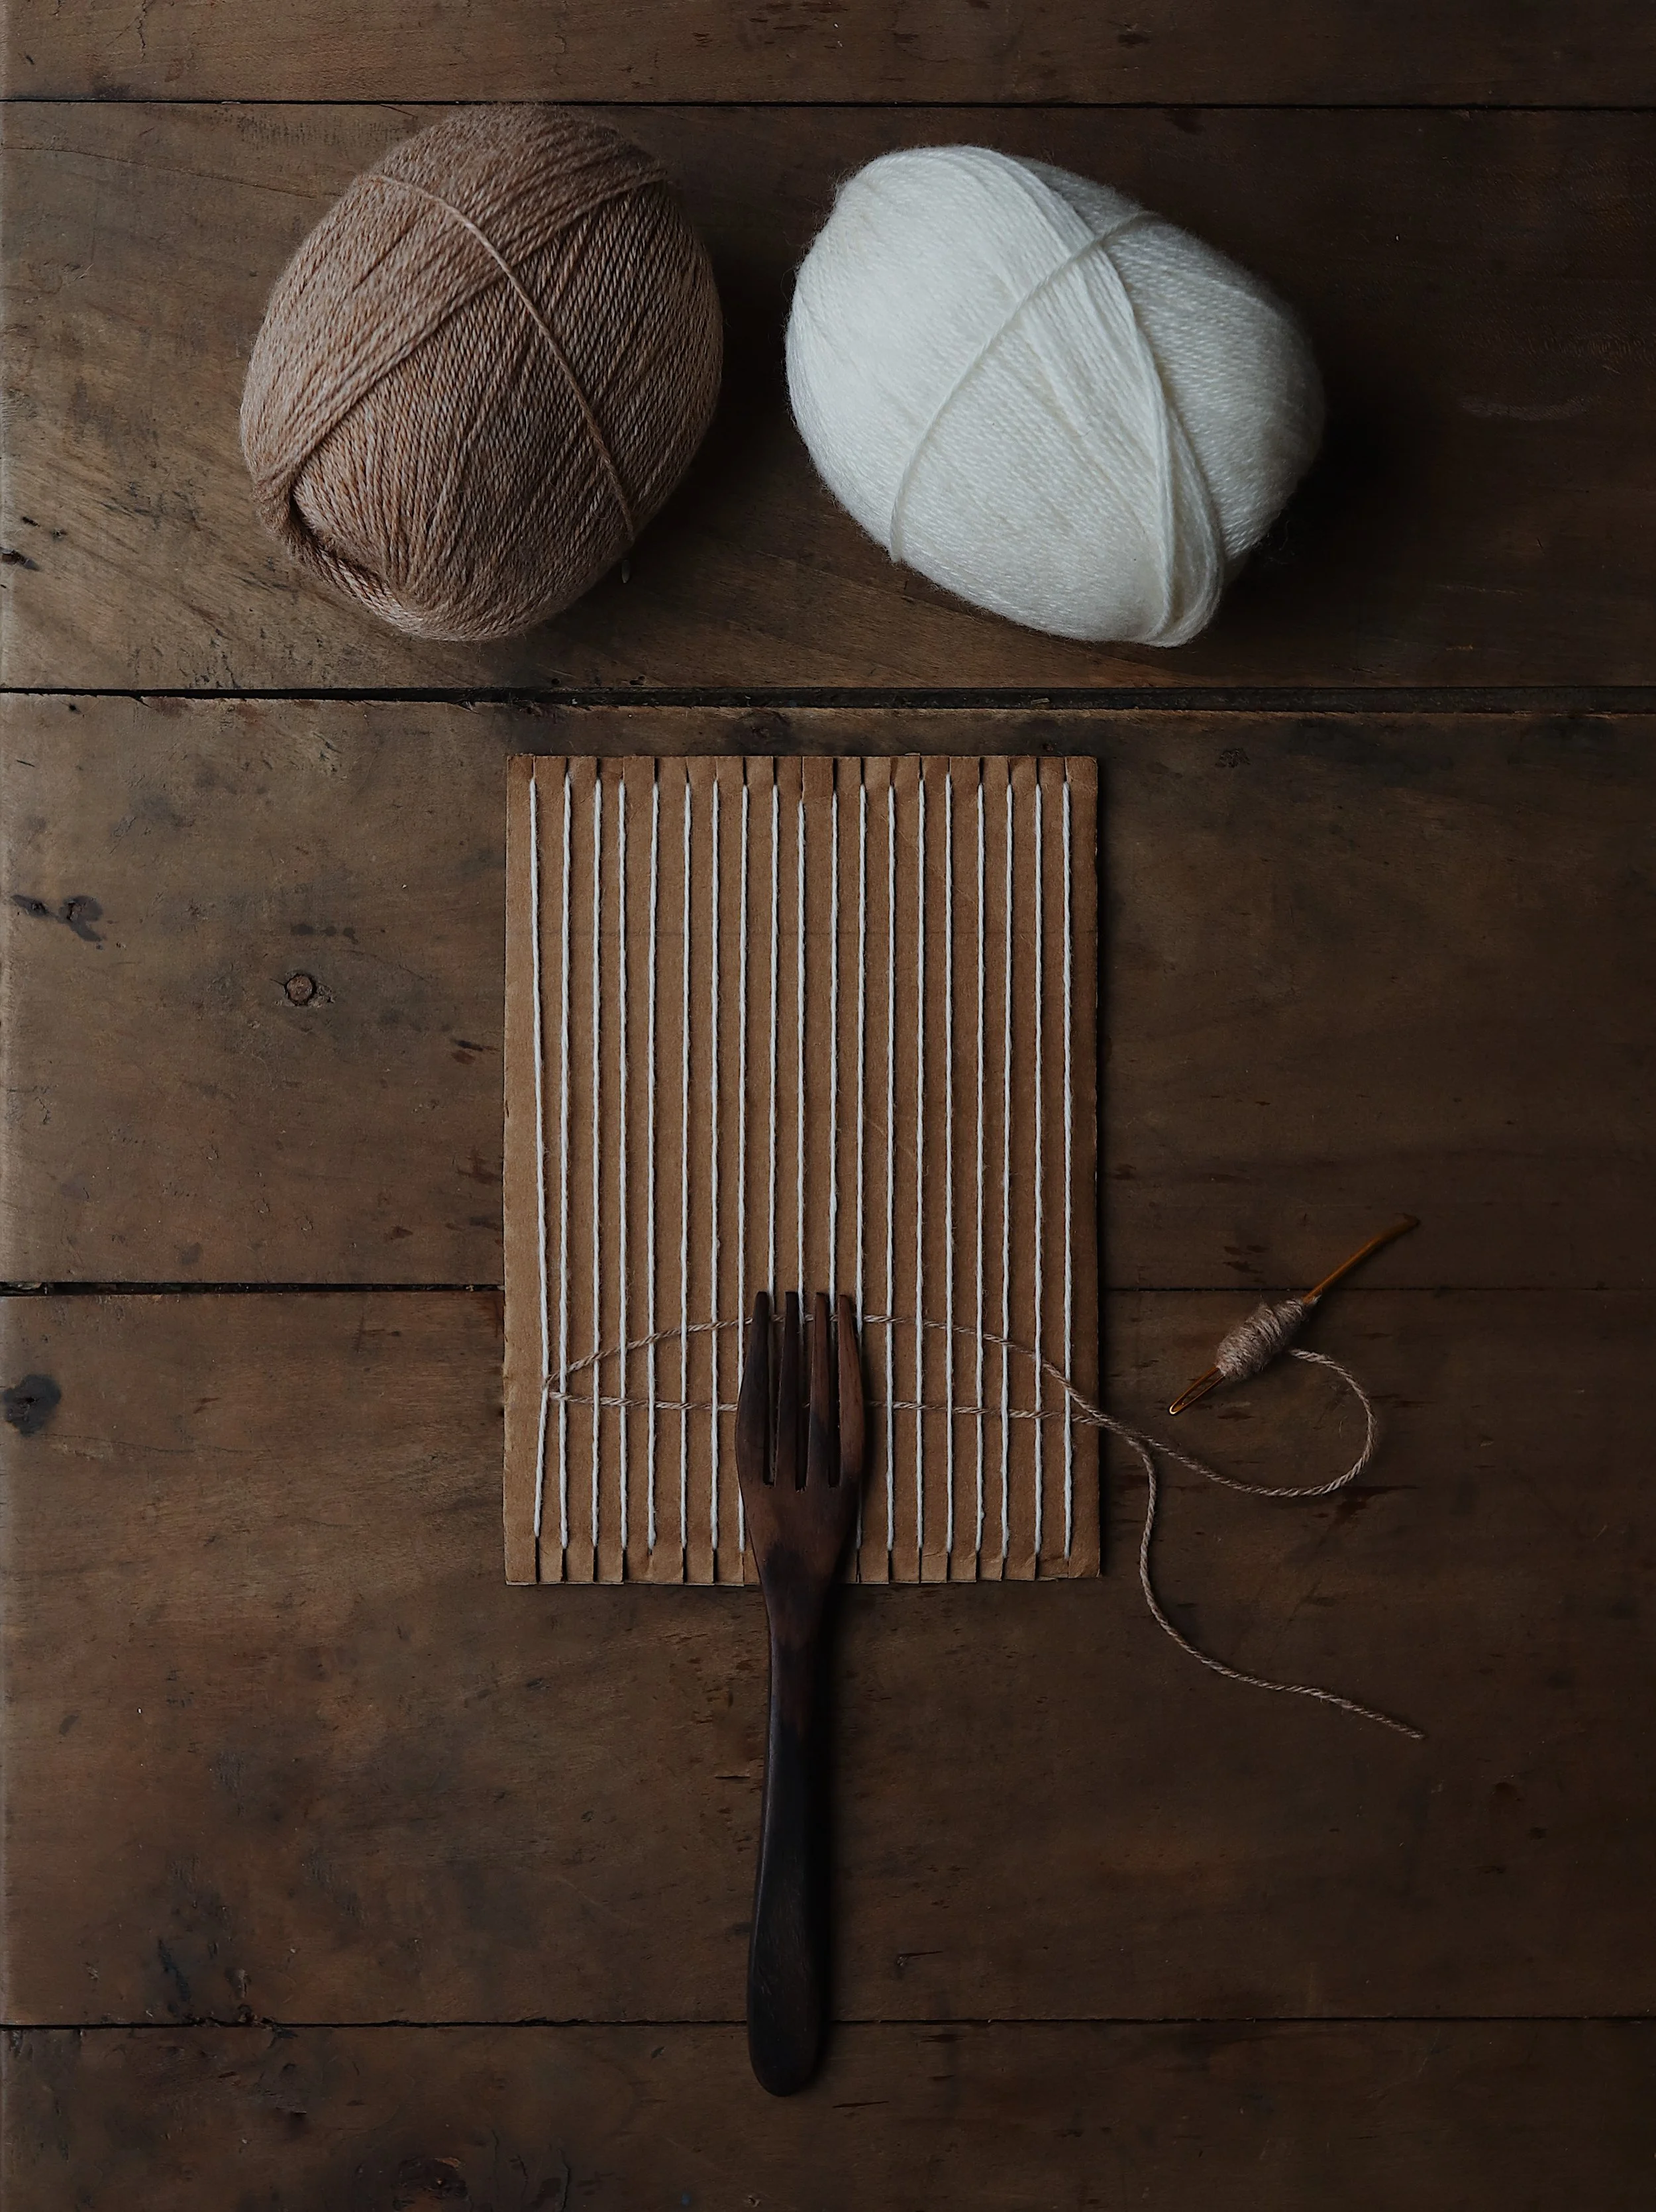
piece of 5” x 7” cardboard
yarn (wool or cotton)
pencil
masking tape
tapestry needle
scissors
fabric glue
ruler
fork
Directions
1. Using a pencil, make 20 marks, 1/4 inch apart, along the 5” side of the cardboard.
2. Using scissors, cut shallow notches, approximately 1/4 inch deep, where you drew the 20 marks.
3. Mark where your weaving will begin and end by drawing a horizonal line 1 1/2 inches down from the shorter, notched edges on both sides of the cardboard.
4. Place the “warp threads” onto the loom. Warp threads are strung over the loom vertically and tightly to hold tension while you weave. To create the warp threads, insert a long piece of yarn into one of the end notches, allowing the end of the thread to fall behind the cardboard and reach midway down the length of the back of the loom. The excess yarn will be used to create the coaster’s fringes later, so be sure to choose your color accordingly. Tape the end of the warp yarn to the back of the loom.
5. Turn the loom back to the front side. Extend the yarn from the first, top notch to the first bottom notch. Wrap it around the first, bottom notch.
6. Wrap the yarn around the backside of the cardboard, through the second, top notch and down to the second, bottom notch.
7. Continue wrapping the yarn around and around the cardboard, using the notches to secure it in place.
8. When you reach the last notch, bring the yarn to the back of the piece of cardboard and cut it at the midway point of the cardboard. Tape the tail to the backside of the cardboard.
9. Begin to weave your “weft threads” through your “warp threads”. The weft threads are the threads you weave over and under the warp threads horizontally.
10. For the weft thread, cut a piece of yarn about 8 yards long and thread it through the tapestry needle.
11. Starting on the left side at the bottom guideline you marked on the cardboard, weave the needle over one warp thread, under one warp thread, over one warp thread, under one warp thread.
12. Continue weaving in this over-and-under pattern across all of the warp threads.
13. When you reach the end of the first row, pull the yarn through, leaving a 4 inch tail on the original side of the row. Once you’ve finished weaving the entire coaster, you’ll thread this tail into the backside of the coaster (to hide it).
14. Now weave your way back from right to left, following the same under one, over one pattern. Be careful not to pull the yarn too tight, otherwise the coaster will get skinner and skinner as you go.
15. When you pull your yarn through, create an arc to ensure your weaving isn’t too tight. Then take a fork and use the tins to pull the arc down.
15. Continue weaving until you’ve finished weaving all your yarn, or until you reach the end mark for weaving. Be sure to leave a four inch tail from the edge.
16. Turn your loom over and remove the tape from both of the tails of the yarn.
17. Cut all the warp threads through the middle (on the back side of the loom) and carefully remove all the warp threads from the notches of the loom. Then remove the warp threads from the cardboard loom.
18. Hide the loose tails on the sides of the coasters by threading them into the coaster. To do this, thread the loose tails onto an embroidery needle and insert the needle down the channel inside the long side edge of the coaster. Carry the tail down about an inch inside the edge to make sure it remains secure. When It’s been pulled all the way through, cut the remaining tail.
19. Finish the fringed edges by taking the warp threads, two at a time, and tying them together using an overhand knot. Repeat so that all the warp threads have been knotted together.
20. Trim the fringe to your desired length.